
WhatsApp Chat
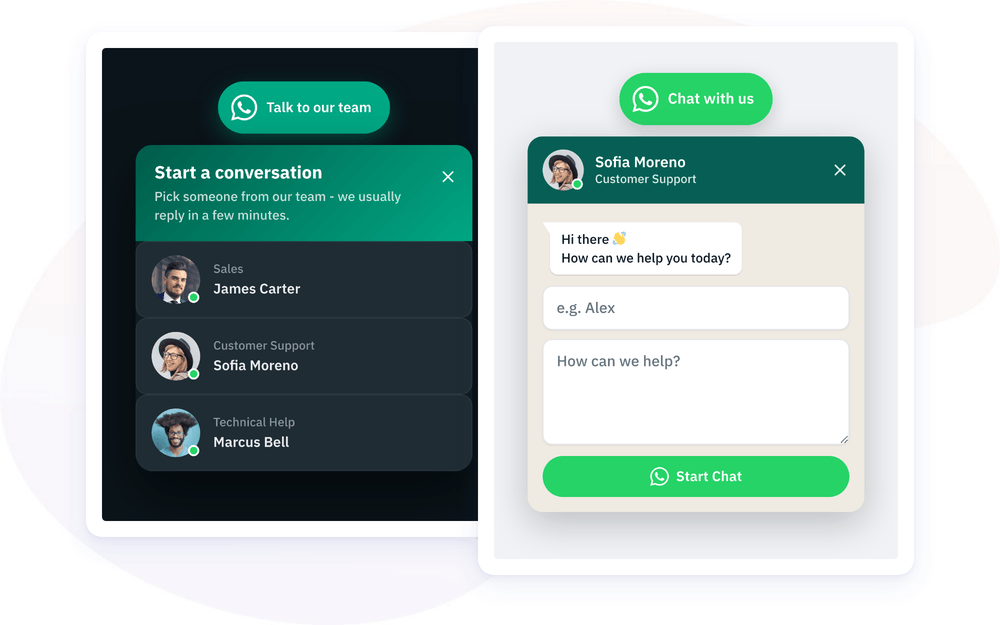
Meet the Divi Sensei WhatsApp Chat module for Divi! Give your visitors a one-click way to message your business on WhatsApp. Pin a chat button to a corner of the screen, or place it inline next to your content. A click can open a small chat box with a welcome message and a short form, or jump straight into WhatsApp. Add every member of your team as an agent, each with a photo, a number and their own working hours. No API key, WhatsApp account or third-party script is needed, so the module loads nothing from WhatsApp and tracks no one.
With the WhatsApp Chat module you can:
- Add a floating chat button that follows visitors down the page, or an inline button inside your layout
- Let the button open a chat box with a welcome message and a form, or start WhatsApp right away
- Add multiple agents and let visitors choose who they want to talk to
- Give each agent working hours, an online/offline dot and a message for when they are away
- Ask for a name, topic and message and pass them into the WhatsApp message
- Draw attention with a notification badge or let the chat box open on its own after a few seconds
- Restyle the button, chat box, agent list and form from the Design tab
Installation
Divi Sensei WhatsApp Chat comes as its own plugin:
- In your WordPress dashboard, open Plugins → Add New → Upload Plugin
- Choose the plugin ZIP file, click Install Now and then Activate
- You will find the WhatsApp Chat module in the Divi Builder’s module list
How the module works
WhatsApp Chat is built from a parent module and child items. The parent is the widget: the button, its position, the click action and the chat box. Every child item is an agent, a person or a team with their own WhatsApp number, photo, working hours and chat form.
How many agents you add decides what happens on click:
- One agent: the button opens that agent’s chat window directly
- Two or more agents: the button first opens a list of agents. Visitors choose one, and a back arrow takes them back to the list
Agents without a valid WhatsApp number are left out on the page. As long as no agent has a number, nothing appears on the frontend and the Visual Builder shows a reminder instead.
How to add the WhatsApp Chat module
- Edit a page with the Divi Visual Builder
- Click the + (Add New Module) button
- Type WhatsApp in the search and click Sensei WhatsApp Chat
- Open the first agent and fill in the WhatsApp Number
- Add one agent for each person or team visitors should be able to reach
NOTE: A floating button sticks to a corner of the screen no matter where the module is placed, so any section will do. To show it on the whole site, place it in a Theme Builder footer. In the Visual Builder, the module appears as a small placeholder. Click the placeholder or the chat button to open the settings; the chat box opens along with them, so you can see your styling as you work.
Behavior and Placement
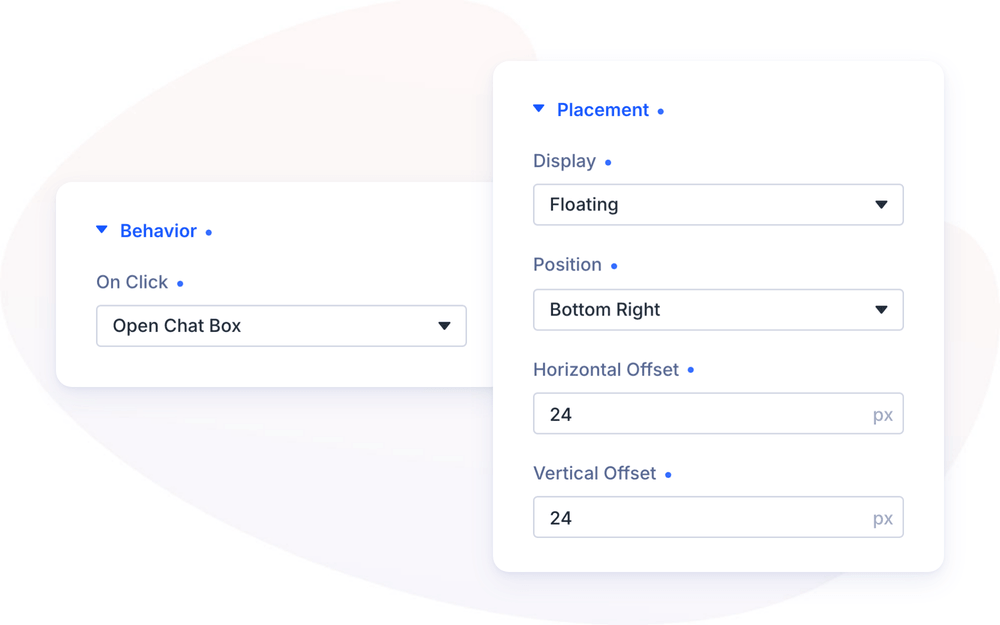
On Click in the Behavior group decides what the button does:
- Open Chat Box shows a chat window with the welcome message and the form fields you set up for each agent. Visitors fill them in, then the chat button takes them to WhatsApp
- Open WhatsApp Directly skips the chat window and starts WhatsApp at once. If there are two or more agents, visitors still choose one from the list first
The Placement group decides where the button shows up:
- Display – Floating pins the button to a corner of the screen without taking up space in the layout; Inline shows it right where the module is placed
- Position – the corner for a floating button: Bottom Right, Bottom Left, Top Right or Top Left
- Horizontal Offset and Vertical Offset – how far a floating button sits from the edges of the screen
- Alignment – left, center or right for an inline button within its column
- Chat Box Position – opens an inline button’s chat box Below the Button or Above the Button. Pick Above for buttons close to the bottom of the screen
Button
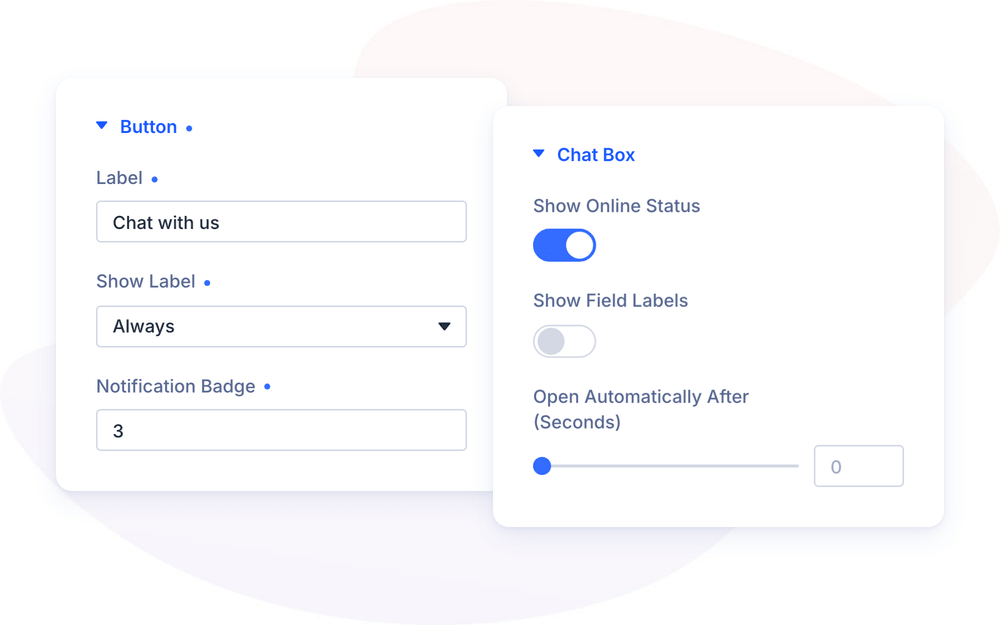
The Button group holds the button’s content:
- Label – the text beside the WhatsApp icon, such as “Chat with us”. Screen readers use it as the button’s name
- Show Label – Always, On Hover (the button expands from the icon) or Never (Icon Only). Screen readers still read a hidden label
- Notification Badge – a short text such as “1” in a small badge on the button. It goes away after the visitor opens the chat box. Leave it blank to hide the badge
Popup Header and Chat Box
The Popup Header group fills the top of the agent list, which appears once the module has two or more agents:
- Image – a logo or photo at the left of the header
- Title – the list heading, such as “Start a conversation”
- Intro – a short line of text below the title
The Chat Box group controls how the chat box behaves:
- Show Online Status – puts a dot on each agent’s avatar, green when they are available and grey when they are offline (on by default)
- Show Field Labels – shows a label above every form field. Screen readers announce the labels even when they are hidden
- Open Automatically After (Seconds) – opens the chat box by itself after the chosen number of seconds. It does this once per browser session and stops once the visitor has opened or closed the box. Set it to 0 to switch it off. It never opens by itself in the Visual Builder
Agents
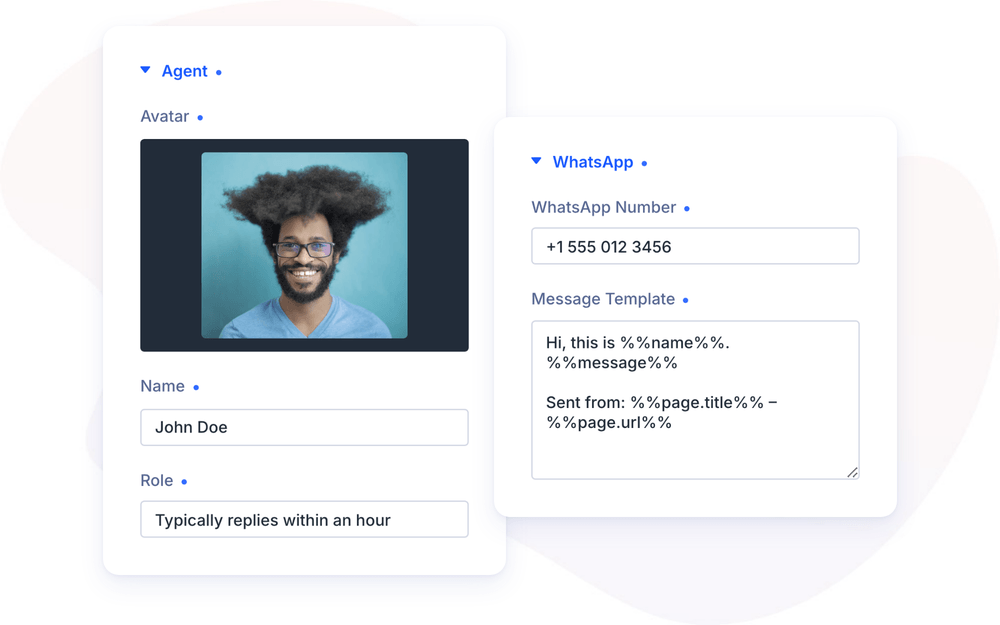
Every child item is an agent. The Agent group controls how they are presented:
- Avatar – the photo or logo in the agent list and at the top of the chat window
- Name – the person or team name, such as “John Doe”
- Role – a short line next to the name, such as “Sales” or “Typically replies within an hour”
The WhatsApp group links the agent to WhatsApp:
- WhatsApp Number – the agent’s number including the country code. You can write it any way you like, e.g. +49 (0) 151 234-567 or 0049 151 234567; spaces, dashes and brackets are removed automatically
- Message Template – the text that is already filled in when WhatsApp opens. Leave it blank to send only what the visitor typed, or no text at all when WhatsApp opens directly
You can use these placeholders in the template:
- %%name%%, %%topic%% and %%message%% – the visitor’s answers from the agent’s chat form
- %%page.url%% and %%page.title%% – the page the visitor is looking at
- %%site.name%% and %%site.url%% – the name and address of your website
NOTE: Fields that are shown in the form but missing from the template are still included, as “Label: value” lines in the order they appear in the form. A Topic field without %%topic%%, for example, is added above the message line. Empty and unknown placeholders are dropped, so one template works for Open WhatsApp Directly too, where visitors fill in no form.
Availability
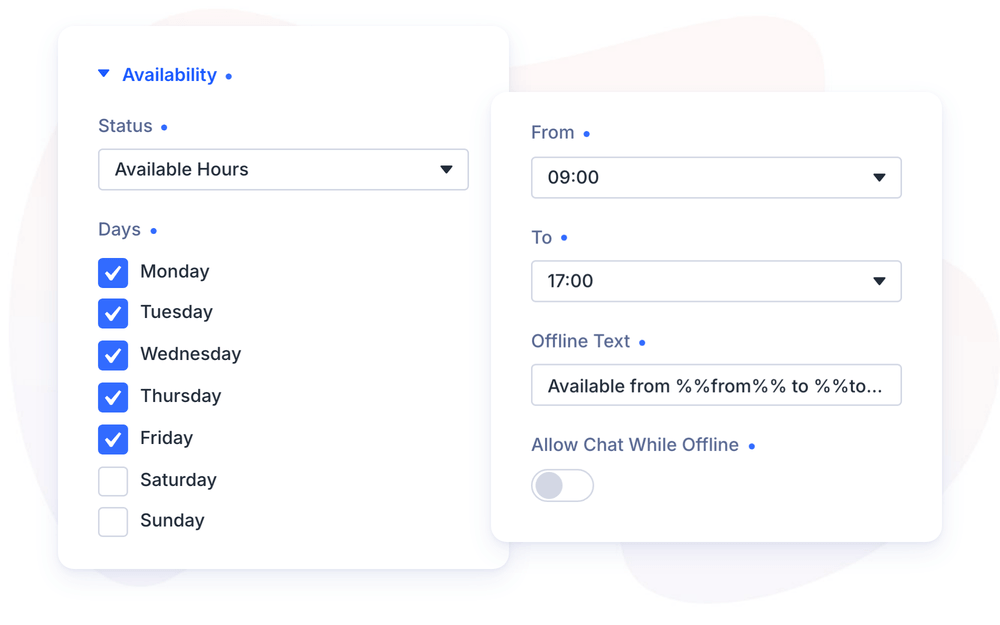
The Availability group decides when an agent can be reached. Status offers three choices:
- Always Online – the agent is always available (default)
- Available Hours – the agent is available on the ticked Days, from From until To. If To is earlier than From, the hours run past midnight, e.g. 22:00 to 06:00
- Offline – the agent is unavailable, for example while on vacation
Two more options decide what visitors see when an agent is offline:
- Offline Text – a note shown with the agent while they are away. Use %%from%% and %%to%% to show the working hours, e.g. “Available from %%from%% to %%to%%”. Leave it blank to show nothing
- Allow Chat While Offline – off: the offline agent is greyed out, can’t be selected and their chat button is disabled. On: visitors can still send a message, and the agent replies later
NOTE: Working hours follow the timezone of your website, set under WordPress › Settings › General › Timezone. Check that it matches your team’s timezone. The online status is re-checked every minute while the page stays open, so it is correct even on cached pages.
Chat Form
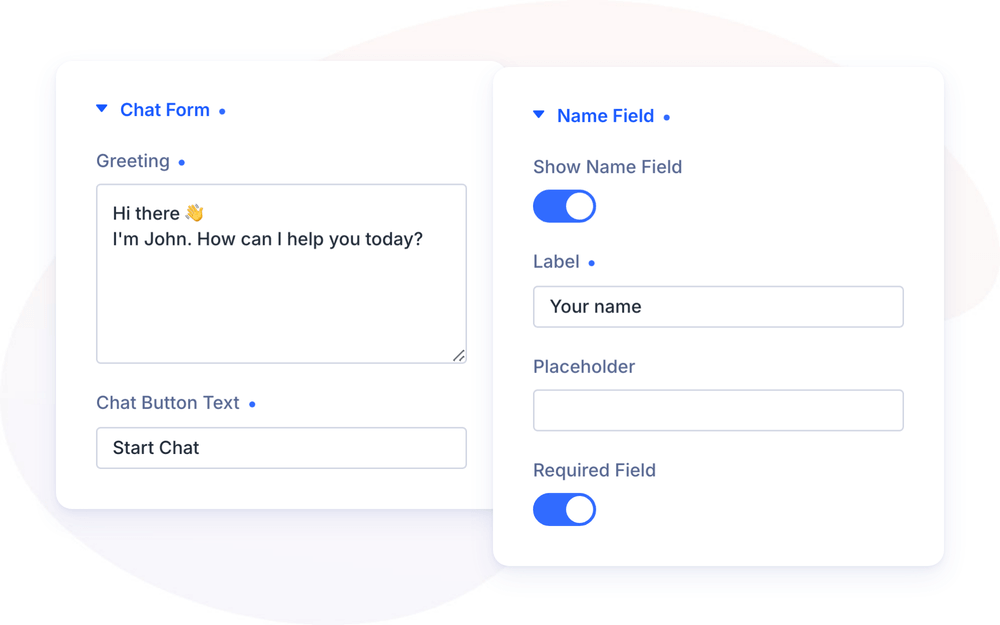
In Open Chat Box mode, every agent gets their own chat window, filled from the Chat Form group:
- Greeting – a welcome message shown as a chat bubble from the agent. Line breaks are preserved. Leave it blank for no greeting
- Chat Button Text – the label of the button that opens WhatsApp, such as “Start Chat”
Below the greeting, each agent can ask for up to three things, each set up in its own group:
- Name Field – a one-line field for the visitor’s name (%%name%%), shown and required by default
- Topic Field – a dropdown with topics to choose from (%%topic%%). Switch on Show Topic Field and enter the choices under Options
- Message Field – a larger field for the visitor’s message (%%message%%), shown by default
Each field has its own Label, Placeholder (the grey hint inside an empty field, or the first, empty choice of the dropdown) and Required Field switch. WhatsApp only opens once all required fields are filled in; otherwise an error message appears next to the empty field.
Design Settings
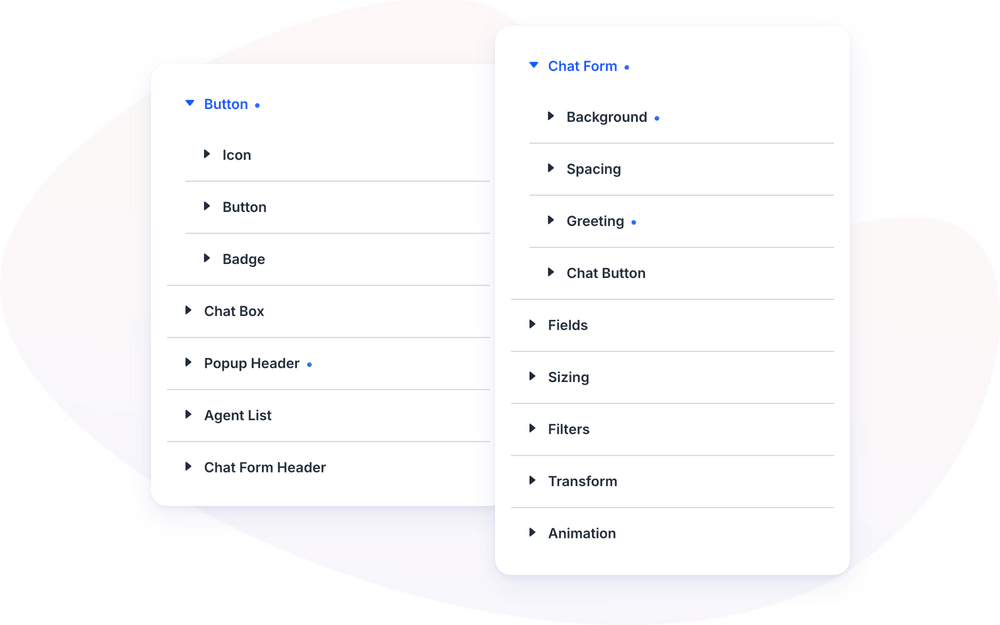
The Design tab is organized by the parts of the widget. Each group splits into smaller sub-toggles, and some of them have tabs for the text and the look of an element:
- Button – Icon for the icon color and size; Button with a Button Text tab (label font and spacing) and a Button Style tab (background, spacing, border, box shadow); Badge with a Text tab (font) and a Style tab (background, spacing, border)
- Chat Box – background, size, spacing, border and box shadow of the window that opens
- Popup Header – background, spacing, image, title and intro of the agent list header, plus the Close & Back Buttons (icon color and size, background, border)
- Agent List – Item Style for the background, spacing, border and box shadow of each entry; Status Dot for the online color, offline color, size and border; and separate settings for the avatar, role, name and availability text
- Chat Form Header – background, spacing, border, avatar, name and role at the top of an agent’s chat window. With only one agent, the Close & Back Buttons settings move here
- Chat Form – background and spacing of the chat window, the Greeting bubble (Text and Style tabs) and the Chat Button (Button Text and Button Style tabs)
- Fields – the form fields with their labels and placeholders, plus the Focus Color that highlights the field being typed in
The widget’s default look is stored as the default value of each setting: shadows of the button and chat box, button and badge colors, the greeting bubble, the chat button, the status dot colors and the field borders. Change a value to restyle that part, or set a box shadow to None or a border width to 0 to remove it.
You only see the toggles that apply. Chat window toggles disappear in Open WhatsApp Directly mode, and Popup Header and Agent List disappear as long as there is only one agent.
Filters, Transform and Animation affect the whole widget, the button and the chat box together. Sizing controls the width of the module’s placeholder, and Spacing is available for Inline buttons.
Privacy
Privacy is built in. The module only uses plain WhatsApp links (wa.me): no WhatsApp script, API or account, no requests to other servers, no cookies and no tracking. Whatever visitors type into the chat form stays in their browser until they click the chat button, and then only travels as part of the WhatsApp link.
Accessibility
- The chat box works as a real dialog: Esc and the close buttons close it, and the focus goes back to the button
- Screen readers still announce a hidden button label, hidden field labels and each agent’s online status
- Errors in required fields are announced, and the focus jumps to the first empty required field
- Visitors who prefer reduced motion get no hover or opening animations
- On right-to-left sites, the left/right positions and the chat box layout flip automatically
For Developers
Each time WhatsApp opens, the widget fires a ds-whatsapp-chat-open event. The event bubbles up from the widget, and its detail contains the number and the mode (chatbox or link). Use it to count chat starts in your analytics, for example:
document.addEventListener('ds-whatsapp-chat-open', function (event) {
    console.log('WhatsApp chat opened', event.detail.mode);
});
Advanced Settings
The Advanced tab has all the usual Divi options: CSS ID & Classes, Custom CSS, Conditions, Visibility, Transitions, Position and Scroll Effects. Custom CSS offers separate fields for the Button, Label, Chat Box, Greeting, Form Fields, Field Errors, Chat Button and List Item, and every agent adds fields for its own List Item and Chat Window.
Design Ideas
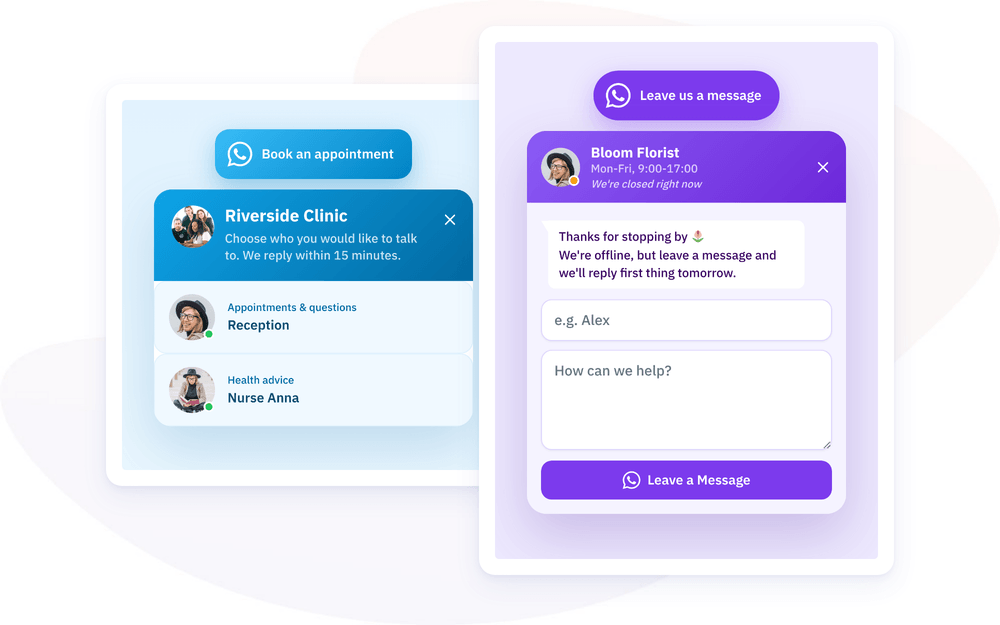
- Team help desk – three agents for Sales, Support and Billing with their own working hours, and Allow Chat While Offline on so visitors can always leave a message.
- Appointment requests – a single agent with required Name and Topic fields and a template such as “Hi, I’m %%name%% and I’d like to book: %%topic%%”.
- Questions about a product – an Inline button below the add-to-cart button, Open WhatsApp Directly and %%page.title%% in the template, so you know which product the visitor means.
- Friendly reminder – a Notification Badge with “1” and Open Automatically After at 20 seconds, combined with a personal greeting from a team member.